

The standard operation procedure for conveyor belt vulcanization joint generally includes pre-construction preparation, on-site joint construction process, post-construction documentation, and maintenance.
1. Pre-construction preparation for belt joint:
Understand the specifications and performance of the conveyor belt, as well as the on-site construction conditions. It is necessary to be familiar with the specifications, variety, single roll length, and any special requirements for the adhesive joint, as well as the joint position, total length of the conveyor belt, total length of the frame, frame slope, tensioning device situation, number of joints required, whether crane transportation equipment is needed, and the scheduling of the maintenance downtime. Also, consider the construction environment, weather conditions, dust situation, types of dust, and take necessary protective measures. Prepare the required joint tools, such as vulcanizing machine, adhesive materials, clamps, etc.
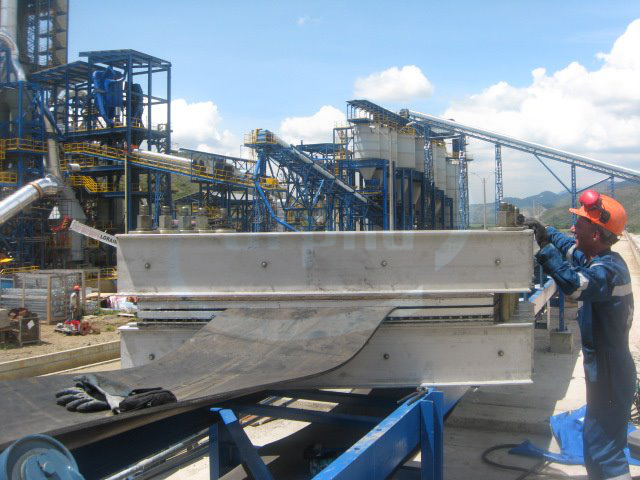
Choose a suitable joint position and fix the conveyor belt with clamps. Remove the support frame and install the vulcanizing machine. Align the two ends of the conveyor belt that need to be jointed and mark them with a steel saw blade. Use tools such as a belt peeler to peel the belt, paying attention to the depth of the cut to avoid damaging the fabric layer. Divide the conveyor belt into several uniform-length steps according to the number of layers and peel them off layer by layer, ensuring that the steps at both ends of the joint can match. Use a tungsten steel grinding disc to roughen the surface of the fabric layer and transition area. The purpose of grinding is to remove surface contamination, increase the surface activity and roughness of the adhesive and fabric, and avoid damaging the fabric layer. Clean the joint surface with a blower and wash it with a cleaning agent, then let it dry. Apply adhesive slurry to the surface of the belt joint with a brush. The slurry should be applied evenly, not too much or too little, and generally applied at least two times. When the surface of the belt joint is not sticky, paste the adhesive film and add a 3 cm wide adhesive film at the step position to fill the gap. Peel, grind, and apply adhesive slurry to the other side in the same way, ensuring alignment and making both ends of the belt in a straight line. Then assemble the vulcanizing machine, use a water pump for pressing, and maintain a pressure of about 1.5 MPa until the vulcanization joint is completed. After the vulcanization time is over, wait for the temperature to naturally cool down to 80℃, cut off the power supply, remove the power cable, and release the water pressure before removing the vulcanizing machine. Inspect the overall condition of the joint, check for blistering, lack of adhesive, etc., and trim both sides if necessary.
3. Record the joint situation of the conveyor belt:
Record detailed information about the length, angle, time, location, and condition of the joint, as well as the transported materials. Regularly inspect the joint area.